Archive for the ‘Uncategorized’ Category

second shoe, no time!

October 27, 2009

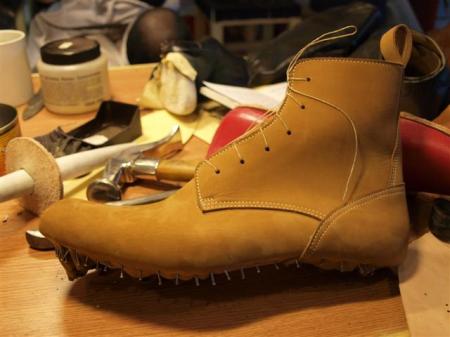
since I don’t have time to do a welted shoe for my 2nd pair, I’ll go with cemented. nothing particularly wrong with that, but since I don’t want a cemented dress shoe, might as well make a boot! with a little help from Marcell, I got the pattern done, the uppers made by Erica, and a start on lasting. See for yourself!

PA271158

the leather of choice: thick sandy nubuck

PA271160

PA271161

the rear

after she works her magic…

PA271172

beautiful as usual

break time!

PA221115

beautiful as usual

PA271173

lasting, all in a days work!

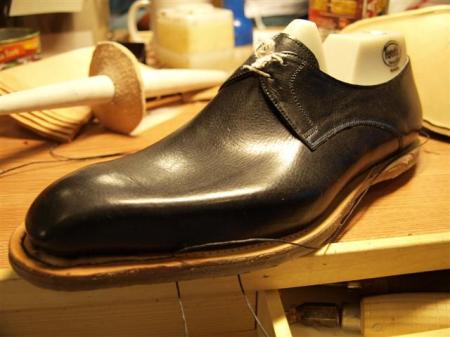
which, at the end of the day, leaves me with:

PA271174PA271175PA271176

I even got a “not bad” from Marcell, probably the kindest words I’ve received to date. I’ll have to take advantage of his good spirits tomorrow. If you don’t see an update before the end of the week, he killed me.


coming to an end

October 27, 2009

so I’m officially on my last week in budapest. back home to victoria on monday the 2nd. but that still leaves me with time to complete another pair of shoes! Not enough time for welted, but a handmade cemented shoe is still handmade, and practice is always good.
Before we get to that, here’s some pictures of all the final steps, and finished pics of my first pair. I’m happy with the pattern and design, but there’s plenty of room to improve. Marcell would agree, probably using ‘different’ words though 😆

continuing stitching through the channel

now that we’re done stitching the welt, here we are:

PA201083

PA211090

so beautiful

so lets move onto the heel. We’ll start by pegging it with wooden pegs, rasp down the excess, then take a snack break:

PA211088

PA211091

warning: not toothpaste

then we throw this thing on the heel and start building it up. peg, rasp, glue, repeat.

PA211098

I guess you could use the toothpaste ketchup on these pearly whites...

PA221103

heeeeels

so now we have most of the heel done!
PA221107

PA231123

talk about old school...

which gives us a smooth sexy heel!

PA241125

then we dye it, and spill dye if necessary, then polish everything up!

PA251136PA251140PA251142

dye the sole!

PA251144

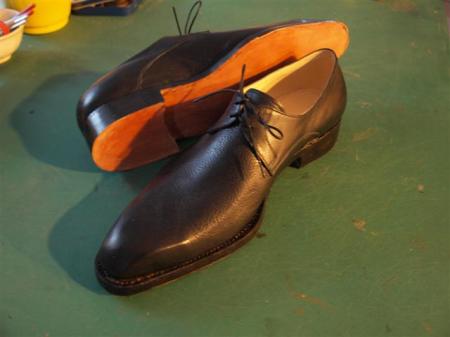
then we do a few finishing steps and, well…here we are. I did a piss-poor job of dyeing the welt, but maybe I can fix that later.

PA271168PA271166PA271169PA271191PA271184

busy bee

October 22, 2009

so it’s definitely been a busy week. next week is going to be even busier, but that’s another story for another day.
so I’ve got quite a bit done this week, as you can see…

done attaching the welt to the insole

done attaching the welt to the insole

and some more work on the high-heels…
PA150971

PA150973

and back to the derbys…I started building the heel. Hammer the rand into the right shape and peg it.

PA161003

stick some cork up in the soles, put in the metal shank for support, and then cover it up

PA161010

wait what’s this? a new knife? yeh. I even managed to pull a hair out and cut it in half with one quick slash. so sharp.

PA191057

and what better way to put it to use than cutting through some of the thickest leather I’ve seen. It’s for the soles btw.

PA191062

PA191065

and the best thing to do with soles (other than walking on them) is stitching them to the welt. But first we have to mark the welt so we know where to stitch, ya?

PA191068

2 welts, 2 times the fun!

2 welts, 2 times the fun!

Needle goes through the mark on the welt, and into and then out of the stitching channel in the sole, seen here:

PA191071

which leaves me with this an hour later:

PA191074

PA191076

And that’s all for today. Another update tomorrow, I promise!

even more good stuff.

October 14, 2009

The past couple days have been pretty busy.
It’s been rainy, then windy, then rainy and windy. It’s only a matter of time before it snows, which isn’t necessarily a bad thing!
So I’m approaching the halfway mark, and I think I’ve learned a pretty decent amount so far. I’m still not finished my first pair but they’re coming along really nicely.

Being the eager beaver I am, I came in on sunday and got started on a pair of high-heels since, you know, wearing regular shoes can get a bit ‘boring’ sometimes.  am I right? so here’s a couple progress pics of them:

10 minutes in...

10 minutes in...

after some lasting...

after some lasting...

But nobody is in here to see high heels so here’s some pics of the good stuff.

I got started on constructing my shoe (since the uppers are all done and ready as you’ve already seen), so here we go from the start:
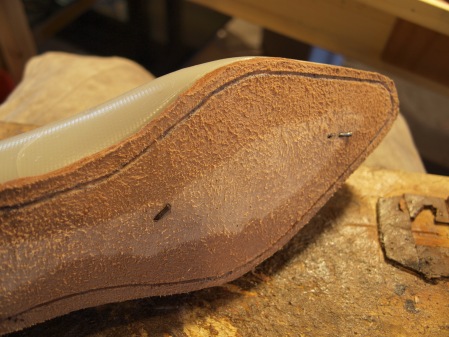
in goes the insole
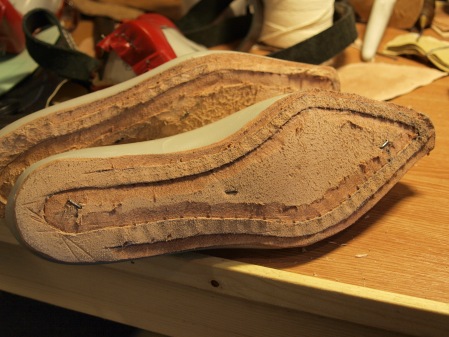
in goes the insole

stitching channel cut and marked (I think that's what it's called)

stitching channel cut and marked (I think that's what it's called)

close up of the holes

close up of the holes

and yet again we start lasting. lets take a look!

PA130920

oh yehh

oh yehh

so now that that’s out of the way, we take out the nails in the toe (which we’ll now refer to as toenails). so we rip out the toenails and last just the lining, which has been hiding underneath the uppers the whole time, just hangin out.

lasted linings

lasted linings

Now we can’t just leave it looking frail and half-naked like that, we we put on the toe-puff to give it a bit of strength and shape. So after some careful skiving and shaping of the toe-puff, on it goes.

yum.

yum.

inside: lining nails. outside: toe-puff nails

inside: lining nails. outside: toe-puff nails

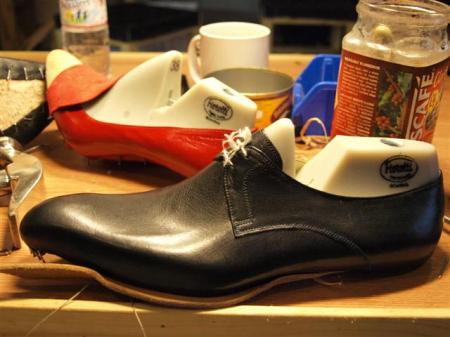
and here’s what we have so far:

gentlemanly black and slutty red

gentlemanly black and slutty red

Now, we start using a rasp and a hammer to shape the toe. This is something you almost never see, but Marcell is very particular about his shoes, so he expects us to do the same. On a Last like this with such strong angles and corners, it makes even more of a difference. See for yourself. Shaped left half vs ugly right half:

PA140947

Now that the toe is how we want it, we stretch the outer back over it and re-last, then hammer all our nails down. Ignoring the heel which looks like it got caught in a tornado…pretty good so far!
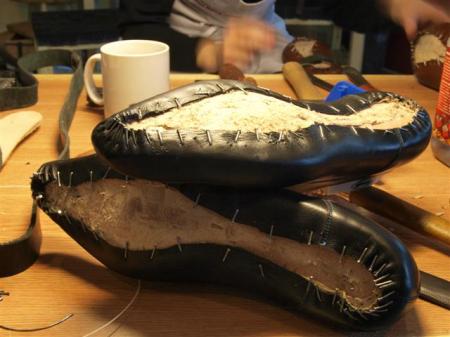
seeing everything take shape really brings a tear to my eye.

seeing everything take shape really brings a tear to my eye.

Now comes my first foray into doing some stitching. I figured my background in sewing would make things tolerable but I found myself cursing under my breath at every opportunity. It didn’t really help though.

But first we gotta wax our thread. I took the opportunity to lather my hands in baby powder. No reason, I just wanted to. But no, it’s not called baby powder, rather…

BABAPUDER up in this bitch

BABAPUDER up in this bitch

Now we get some wax and wax the thread.

smells like bacon and looks like shit. a wonderful substance, really.

smells like bacon and looks like shit. a wonderful substance, really.

Now we start welting. Can’t say I enjoy it but oh well.

incredibly frustrating but it needed to be done

incredibly frustrating but it needed to be done

PA140961

Alas, I couldn’t do all of it in one day, so I’ll pick up tomorrow where I left off. Which is here:
PA140964

More to come soon. ‘Later guys.
October 13, 2009

big update tomorrow. I promise 🙂

The Good Stuff.

October 10, 2009

So now that I’ve got a bit of practice under my belt, Marcell (quite wisely, I must say), must have decided I was ready to tackle a pair of welted shoes for myself.
Like Frodo Baggins, I begin my long and perilous journey.

Like any journey, it’s best to plan things out before you start. So I do this by making a pattern for the shoe. But you’ve already seen this in my last update, so the next step would be…the uppers being made.

I’m currently at swine and peasant status, so Erica gets to make the uppers. And I’m glad she does, because she does one damn fine job, while I gaze on, eyes glazed over with envy. Here’s Erica doing her thing, and the amazing results:

wonderfully black pebbly leather is what we'll be using.

wonderfully black pebbly leather is what we'll be using.

Here we have the pattern for the vamp being traced onto the leather.

PA090838

Same thing as before, except with a silky-smooth leather lining

Same thing as before, except with a silky-smooth leather lining

Erica skiving the edges

Erica skiving the edges

The heel has been sewn!

The heel has been sewn!

erica's gear

erica's gear

getting better and better...

getting better and better...

lining so soft, I can't believe it's not butter.

lining so soft, I can't believe it's not butter.

PA090879

And after a few painstaking hours watching my beautiful creation come into existence (cue lightning, clap of thunder, and frankenstein), we have the finished uppers ready to be lasted.

PA090881

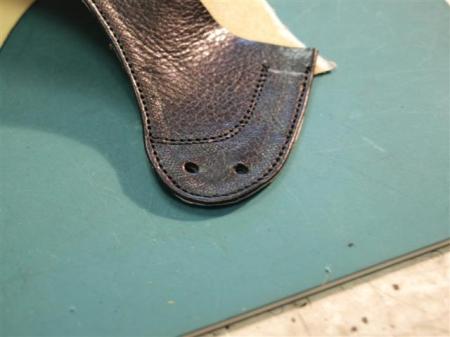
note the sexy blue line of stitching. marcell semi-approved.

note the sexy blue line of stitching. marcell semi-approved.

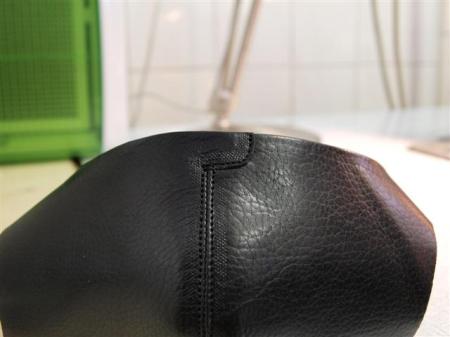
There’s usually a gap on most derby’s (<–type of design I used) between the quarters/eyelets/whatever. I opted to have them touching as you can see in the pic below. Naturally, Marcell disapproved. But I like to irritate him so I went ahead with it anyways. We’ll see how they fit when I’m finished them.

PA090892

PA090883

I can’t let excellent work and design go unappreciated, so here’s a few pictures of Dani (fellow student’s) finished upper. I think we can all agree that she’s very talented. See for yourself!

Like Dani, they're very english.

Like Dani, they're very english.

This picture sums up Erica's skill level. Absolutely amazing is an understatement.

This picture sums up Erica's skill level. Absolutely amazing is an understatement.

Next update will probably be on monday or tuesday. See y’all then.

pattern making. lets do it.

October 8, 2009

So, in between now and my last update I’ve accomplished the following:
1) eating mcdonald’s for probably the first or second time in…5 years?
2) losing my porkchops, yogurt, mustard, and juice to a bunch of rotten thieves. They also took the hostel’s fridge, washing machine, microwave, TV, etc.

Both, as I’m sure you’d agree, are very disagreeable.

But really, I’ve done a bit more than that.
In fact, I actually got to make a start on my first shoe. Well, designing it at least. Tomorrow I get to watch Erica, the upper-maker…make the uppers!
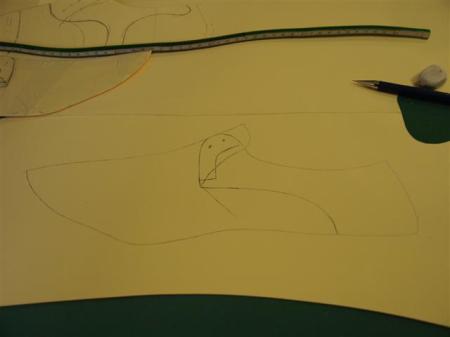
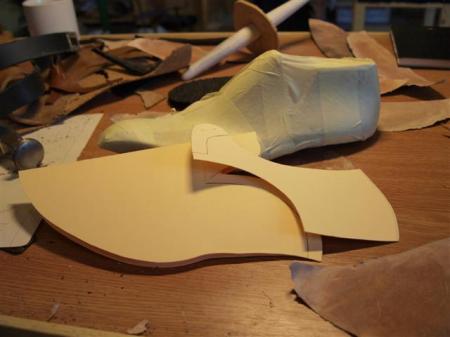
Until then, here’s a couple pictures of what I got so far. The process involved taping the last, drawing on the pattern/shoe, removing the tape and placing the pattern on paper, drawing in the lining, making adjustments, and a bunch of other stuff that I found really difficult because I can draw about as well as I can digest mcdonalds.

2 eyelet derby, elongated toe

2 eyelet derby, elongated toe

off the last, onto paper

off the last, onto paper

my more or less finished pattern, soon to be an upper

my more or less finished pattern, soon to be an upper

I’m pretty excited for the next step, which you’ll see tomorrow. or maybe the day after, depends how slow I am.

More Practice: Cemented Shoe #1

October 5, 2009

I have yet to tackle any welted shoes, as Marcell thinks it is best to practice each of the basic steps first so that when I get to making my own shoes, I will have a much better result. I agree!
Starting with a meticulously sewn upper (no, I did not sew this)…

P1010729

we BEGIN!

P1010731

Getting the first 3 nails in is the hardest, since the medallion on the toe needs to be lined up perfectly. It took me an hour to get the above done…

and even longer to get to this…

straighter than a hollywood stars teeth, as Marcell would say.

straighter than a hollywood stars teeth, as Marcell would say.

P1010736

and hours later of hammering, rasping (similar to coarse sanding), and carefully following directions (well, attempting to), we get to cementing a rubber sole and a heel.

P1010747

look at that perfectly tapered waist. quite similar to my own in fact.

P1010750

not the prettiest, but at least it resembles a shoe. I think Marcell would even agree!

Tomorrow, I get to start designing my own pattern for a shoe of my own.
My hands are already tingling just thinking about it. Or maybe I just hammered my fingers one too many times.

Anyways, back to the hostel. ’til tomorrow!

it's a beautiful dayyyy. just kidding, it's a nighttime shot.

it's a beautiful dayyyy. just kidding, it's a nighttime shot.

day 3: awake on a saturday morning.

October 3, 2009

Weekends are optional, but I actually found myself wanting to get up to do some work on a saturday morning. So, 5Am, and I am awake!

So at the workshop what I have so far is the the insole, and then the Last which is covered by a lining, toe-puff, and the outer. Now we put some cork on the sole!

cork. not just for wine bottles!

cork. not just for wine bottles!

and then we follow that up with a rubber sole trimmed down…

look at that delicious texture

look at that delicious texture

and after a bit more work we cut it off and reveal a cross-section of a cemented shoe. well, just the toe section, but it gives you a good idea of what it looks like.

P1010680

P1010681

then home 🙂

well, I just caught up on 5 days of updates in the last few hours so it’s time for me to get some sleep.  Stay tuned for tomorrow, folks! 🙂

Day 2: Feels Good Man.

October 3, 2009

Another day, another early morning. I’m 9 hours ahead of everyone I love (well 9 hours, 8 hours, and 5 hours but mostly 9). Getting up at 5am gives me time to chat with all my friends as they’re enjoying their evenings.

Today was pretty straight-forward. I took a couple more shots of the workshop before Marcell arrived…
P1010636

apparently he's used all of these at some point...crazy!!

apparently he's used all of these at some point...crazy!!

Today we got to step things up a notch.

First we attach the insole and shave it down so it sits flush with the shoe last…
P1010647

then we attach the lining (which I put on upside down. oops, no big deal though!) After that’s done, we lift up the area around the nails and put in sole glue…VERY strong stuff.

nice work so far! if only those words came from Marcell :(

nice work so far! if only those words came from Marcell 😦

then we take the nails out and get everything shaved down and smooth (unlike my face at moment. more on that later)

P1010658

and to finish up the day, on goes the outer! Lining up the medallion is one hell of a job, but nothing these hands can’t handle.

P1010662

all my work and tools thus far...

all my work and tools thus far...

Good practice so far!
Now I head back to the hostel.

hay guyz

hay guyz